


Pocket doors save swing space by sliding into a cavity inside the wall, making them useful for bathrooms, closets, hallways and other areas where a hinged door would interfere with the room layout.
Installing one, however, involves more than simply hanging a door on a track. In an existing wall, you may need to remove drywall, modify framing and work around electrical wiring, plumbing or HVAC components. Load-bearing walls require additional structural planning.
This guide explains the general installation process in six stages, from checking the wall and preparing the opening to hanging, adjusting and finishing the door. Always follow the dimensions and fastening instructions supplied with your specific pocket door frame or hardware kit.

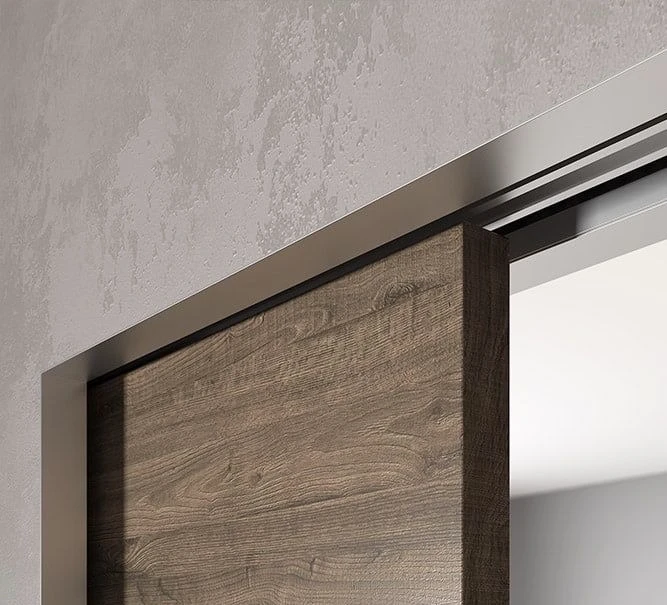
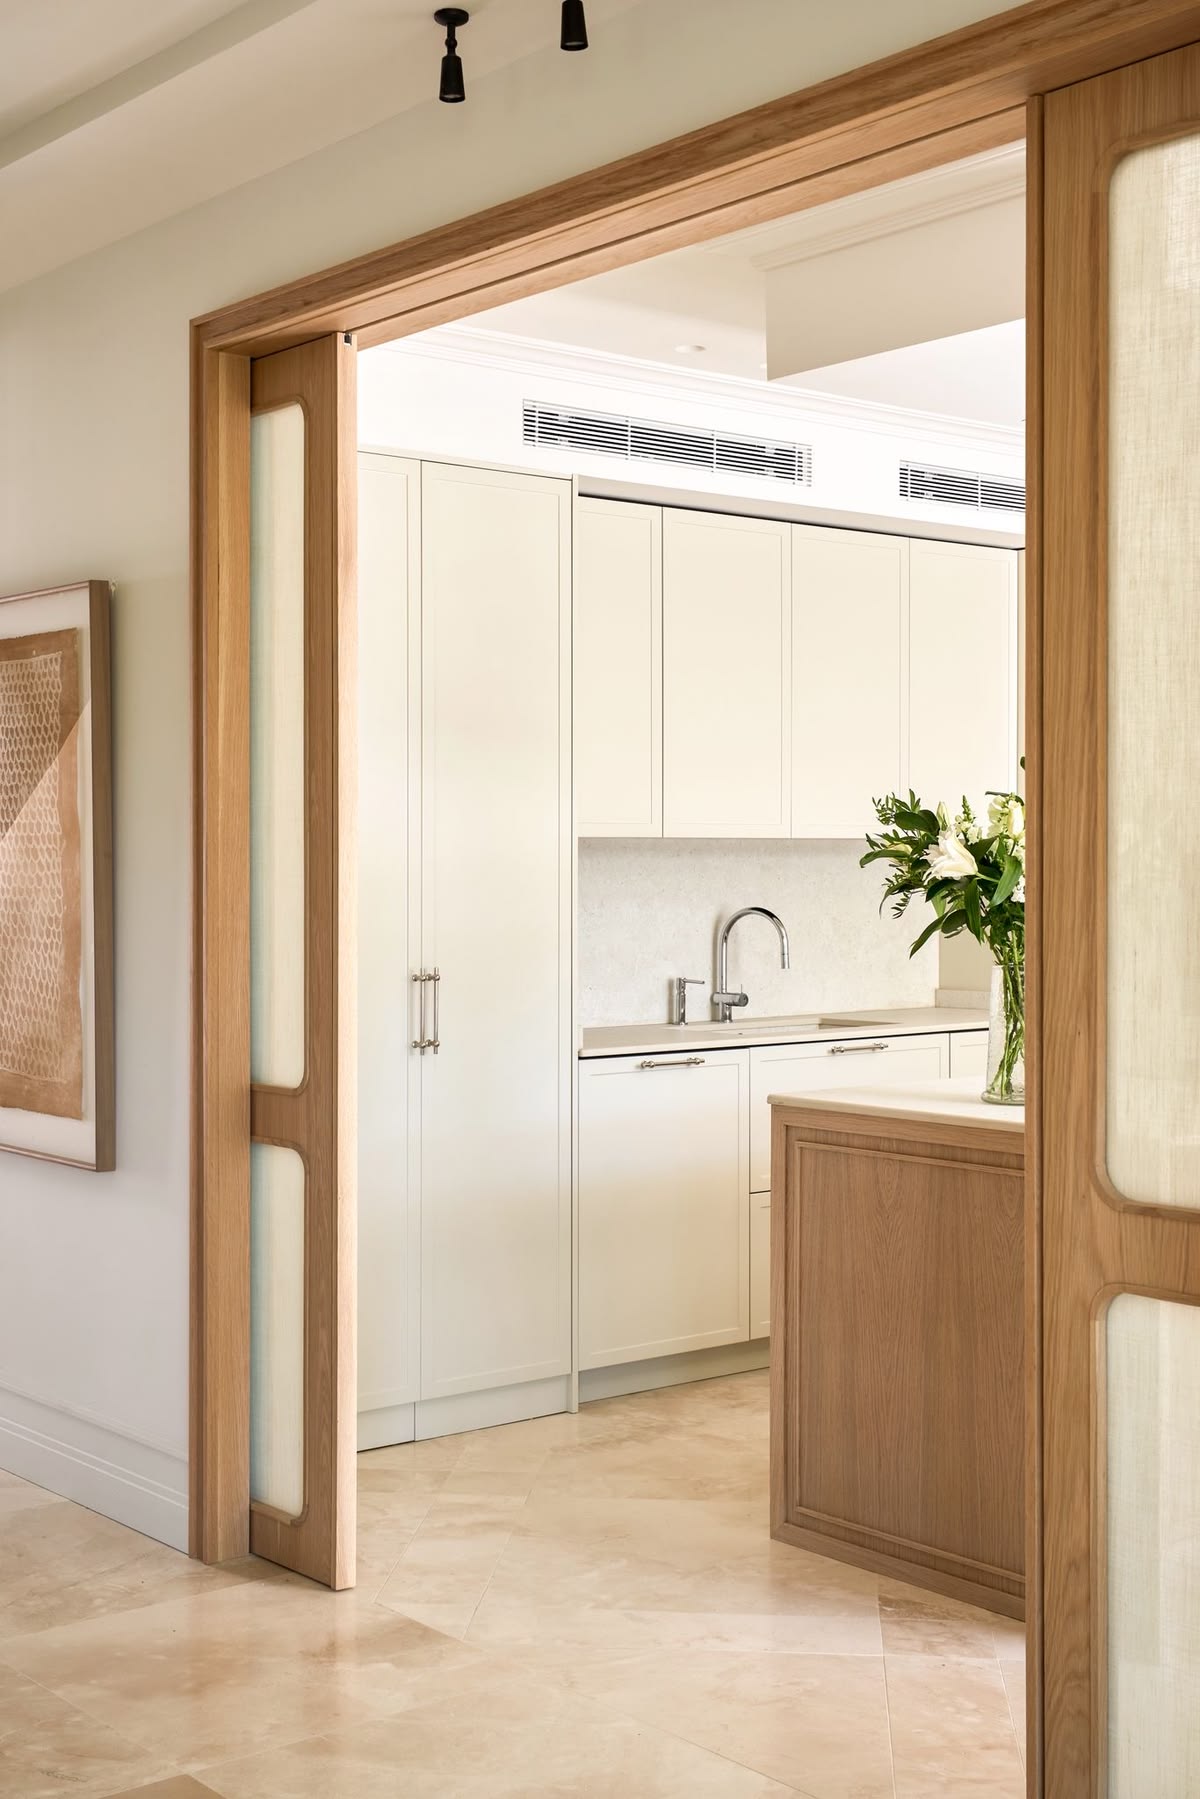
Pocket Door Installation Basics
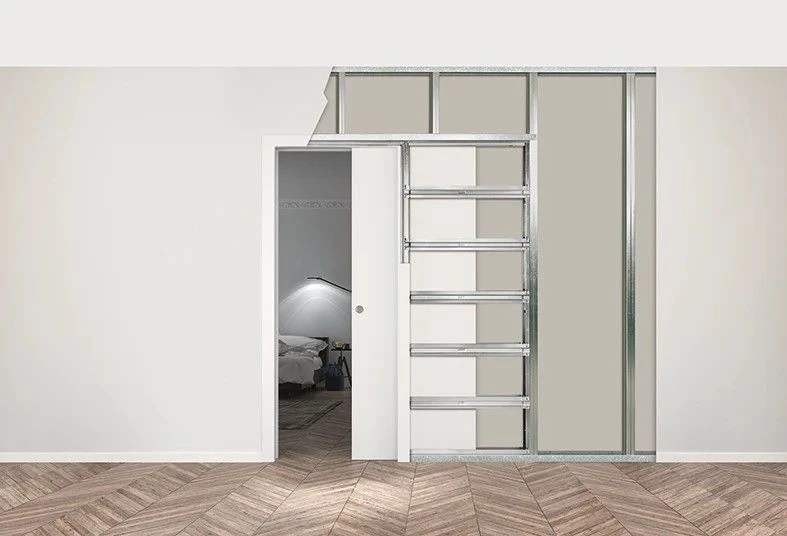
A pocket door slides on an overhead track into a framed cavity inside the wall. Most systems use a dedicated pocket-door frame or split-stud assembly to create enough clearance for the door slab while supporting the finished wall surface.
Retrofitting a pocket door into an existing wall normally requires opening part of the wall, checking for utilities, modifying the framing and installing the track and frame system before the wall is closed again.
Installing a pocket door in new construction can be manageable for an experienced DIYer, but retrofitting one into a finished wall is usually an intermediate-to-advanced project. If structural framing or hidden utilities need to be modified, professional help may be appropriate.
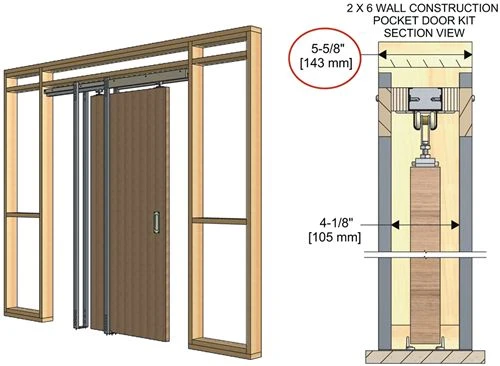
Parts Every Pocket Door Needs
Frame: Creates the wall cavity and supports the pocket-door components.
Track and Hangers: Carry the door and allow it to slide horizontally.
Guides and Jamb Components: Keep the door aligned and finish the opening.
Pocket Door Installation: Pros and Limitations
| Advantages | Limitations |
|---|---|
| Saves door-swing space | Requires space inside the wall |
| Useful for compact layouts | Existing-wall retrofits require demolition |
| Clean appearance when open | Hardware is less accessible after the wall is finished |
| Works with many interior styles | Acoustic sealing is usually more difficult than with a hinged door |
Adding a Pocket Door to Existing Walls
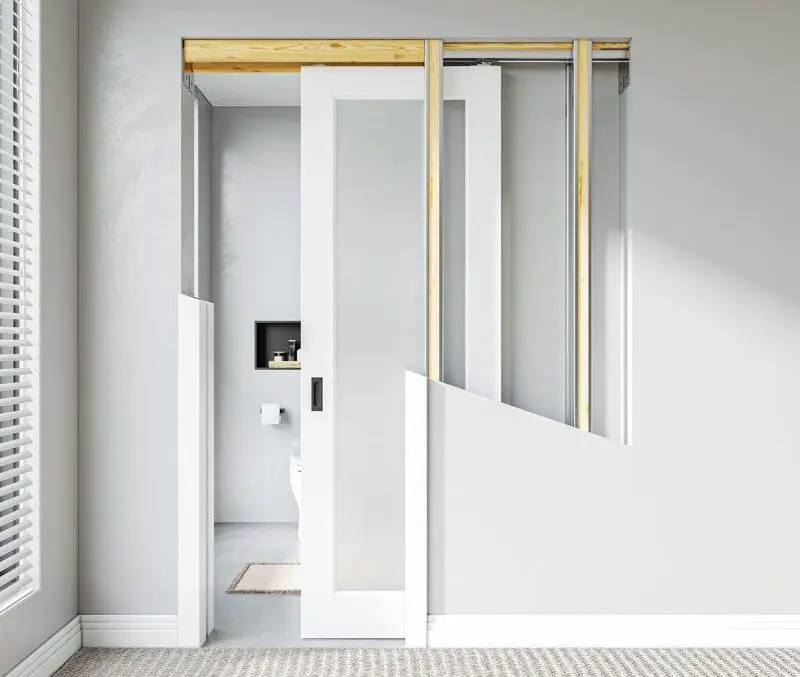
A pocket door can be added to an existing wall, but the retrofit is more involved than installing one while the wall is open during new construction or remodeling. Drywall usually needs to be removed, and the framing must be checked before the pocket cavity can be created.
Before demolition, determine whether the wall is load-bearing and check the pocket area for electrical wiring, plumbing or HVAC components. Any obstruction inside the planned cavity may need to be relocated before installation can continue.
The selected frame system also needs to match the wall construction, door size, door thickness and door weight. Do not assume that every pocket door kit fits every wall.
Must-Do Checks Before You Start
1. Wall Structure: Determine whether the wall is load-bearing before removing studs or changing the header.
2. Hidden Utilities: Check the planned pocket area for electrical wiring, plumbing and HVAC components that may need to be relocated.
3. Frame Compatibility: Confirm that the selected pocket door system is designed for your wall construction, door thickness, door size and door weight.
4. Rough Opening: Use the rough-opening dimensions supplied by the frame or hardware manufacturer rather than assuming one measurement fits every system.
Pocket Door Installation Supplies
Installing a pocket door requires accurate measuring, controlled demolition and careful alignment. Gather the tools and components required by your specific frame system before opening the wall.
Tools You'll Use
Stud Finder: Helps locate framing and identify where further inspection may be needed.
Level: Checks the rough opening, header, frame and track alignment.
Reciprocating Saw: Useful for controlled framing demolition where appropriate.
Tape Measure: Used for the opening, frame and door dimensions.
Hammer and Pry Bar: Help remove trim and framing components.
Drill/Driver: Installs the fasteners specified by the frame manufacturer.
Utility Knife: Scores paint, caulk and drywall surfaces before removal.
Shopping List
Pocket Door Frame or Hardware Kit
Compatible Door Slab
Manufacturer-Specified Fasteners
Shims Where Required
Drywall and Joint Compound
Jamb, Casing and Trim Materials
Pocket Door Pull or Latch Hardware
Step 1: Getting Ready
A successful pocket door installation starts with the wall, not the door. Before removing drywall or framing, confirm that the selected location can accommodate the pocket frame and that structural or utility changes have been identified.

1. Examine Your Wall
Use a stud finder and available plans to understand the wall layout, then inspect further if electrical wiring, plumbing or ductwork may run through the planned pocket area.
Confirm that the selected frame system is compatible with the wall construction before demolition begins.
2. Determine Whether the Wall Is Load-Bearing
Do not remove or cut structural framing until you know whether the wall is load-bearing. Building plans can help, but stud direction or wall position alone is not always enough to confirm its structural role.
If the wall supports floor, roof or other structural loads, the opening may require temporary support and a properly sized header. Consult a qualified contractor, engineer or other appropriate building professional before modifying a load-bearing wall.
3. Match the Frame System to the Door and Wall
Check the frame or hardware manufacturer’s limits for door width, height, thickness and weight. Also confirm the required wall construction, rough-opening dimensions and any soft-close or accessory compatibility before purchasing the door slab.
| Check Before Buying | Why It Matters |
|---|---|
| Door width and height | Must match the frame system |
| Door thickness | Affects pocket clearance and hardware compatibility |
| Maximum door weight | Track and hanger capacities vary by system |
| Wall construction | Frames are designed for specific wall assemblies |
| Rough opening | Dimensions vary by manufacturer and series |
| Accessories | Soft-close, locks and guides may have compatibility limits |
If you are still confirming the door dimensions, use our pocket door size guide before finalizing the rough opening.
Step 2: Taking Out Old Doors (When Needed)
If you are converting an existing hinged doorway, remove the door slab, hardware, casing and trim carefully before opening the wall. Components that are in good condition can be set aside for reuse where appropriate.
Score painted or caulked joints before prying off the casing to reduce surface damage. Once the trim is removed, expose enough of the wall to inspect the framing and create the pocket-door rough opening.
Careful Removal Steps:
- Score painted and caulked seams with a utility knife.
- Remove casing gradually with a pry bar and protective wood block.
- Label reusable trim pieces before setting them aside.
- Stop demolition if hidden wiring, plumbing or other services are exposed.
Step 3: Building the Pocket Space
Prepare the rough opening and pocket frame according to the dimensions supplied with the selected system. The exact opening depends on the frame design, door size and wall construction, so do not rely on a universal rough-opening formula.
Remove only the framing required for the new opening. If the wall is load-bearing, structural changes must follow the approved header and support design.
Install the split studs, uprights or cassette components supplied with the pocket-door system. Keep the cavity straight and clear so that the door slab will not contact framing or fasteners after the wall is finished.
Critical Framing Checks:
- Build the rough opening to the dimensions specified for the selected pocket-door system.
- Confirm that the opening and header are square, plumb and level.
- Install split studs, uprights or cassette components exactly as shown in the manufacturer’s instructions.
- Keep fasteners and framing from protruding into the door cavity.
- Check alignment before closing the wall.
Common mistake: Treating the pocket frame like conventional wall framing. Pocket-door systems require specific clearances and component spacing so the slab can travel inside the finished wall without rubbing or binding.
Step 4: Putting In Track and Frame
Install the pocket-door frame and overhead track according to the manufacturer’s sequence. The rough opening and header should already be square, plumb and level before the frame is secured.
Check the track carefully with a level before tightening the fasteners. An out-of-level track can cause the door to drift, rub or bind during operation.
Install the frame uprights, floor brackets and guides in the positions specified for the system. Recheck the assembly before the wall is closed.
Track Installation Checks:
- Use the fastener type and length specified by the pocket-door manufacturer.
- Confirm that the track is level before hanging the door.
- Make sure rollers or hanger carriages move freely through the track.
- Keep fasteners from protruding into the pocket cavity.
- Recheck the frame before installing the finished wall surface.
Test Before Closing the Wall:
If the system allows the door to be hung at this stage, slide it through its full travel and check for rubbing, binding or uneven clearance before the wall surface is finished.
Manufacturer instructions should take priority because rough-opening dimensions, fasteners and frame components vary between systems.
Step 5: Mounting the Door
1. Add Rollers
Attach the hanger plates or roller hardware to the top of the door according to the kit instructions. Position them accurately so the door weight is carried evenly and the adjustment hardware remains accessible.
2. Secure the Door
Lift the door into position and connect the hangers to the track system. A second person can help support a heavier slab while the hardware is engaged.
Once the door is hanging, slide it slowly through the opening and confirm that it moves freely without contacting the frame.
3. Set Up Guides
Install the floor or jamb guides supplied with the system. The guides should keep the door aligned without clamping the slab or creating unnecessary friction.
4. Fix Any Misalignment
Use the hanger adjustment mechanism to set the door height and keep the slab plumb. If the door rubs, drifts or does not close evenly, recheck the track level, hanger adjustment and guide position before proceeding.
Step 6: Final Steps
With the door properly hung, you can now focus on the finishing details:
1. Add Trim Work
Install the jamb and casing components according to the frame system, taking care not to drive fasteners into the area where they could contact the moving door. Fill visible gaps and prepare the trim for finishing.
2. Apply Finish
Paint or stain the door and trim as required for the interior design. Allow the finish to dry fully before repeated operation.
3. Test the Door
Open and close the door repeatedly to confirm that it travels smoothly through the full opening. Check the floor clearance, jamb alignment, guide position and pull or latch operation before considering the installation complete.
Address any rubbing, noise or uneven gaps before the final finishing work is signed off.
Fixing Common Pocket Door Problems
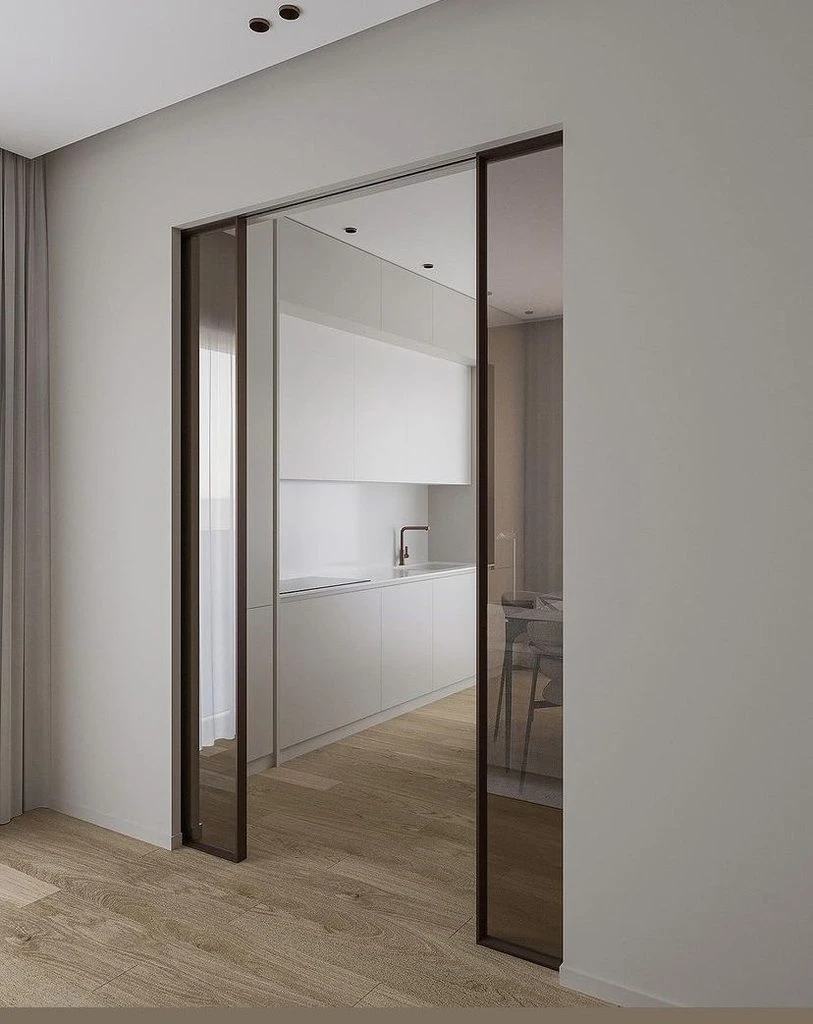
If a newly installed pocket door sticks, rattles or becomes difficult to slide, check the alignment and clearances before assuming the hardware needs to be replaced.
Door Sticks or Feels Hard to Slide
Check the track for debris, confirm that the hangers move freely and make sure the floor guides are not clamping the slab. If the problem began immediately after installation, recheck the frame and track alignment.
Door Rattles or Makes Noise
Check for loose hanger hardware, misaligned guides and contact between the slab and the jamb or pocket frame. Use only lubricants or maintenance products recommended for the installed hardware system.
Door Rubs Inside the Pocket
If the door rubs inside the wall cavity, stop using it until the cause is identified. Check for protruding fasteners, bowed framing, incorrectly positioned guides or insufficient clearance around the slab.
Do not drive additional nails or screws into the pocket wall unless you know their length and location cannot interfere with the moving door.
Pocket Door Installation FAQs
Yes. However, the wall normally needs to be opened so the framing, utilities and available pocket space can be checked. Existing-wall retrofits are usually more involved than installations completed while the wall is already open during construction or remodeling.
The rough opening depends on the door size and the specific pocket-door frame system. Some single-door systems use an opening around twice the door width plus an allowance, but this is not a universal rule. Always use the rough-opening dimensions supplied with the frame you are installing.
It can be possible, but modifying a load-bearing wall may require temporary support and a properly sized structural header. Do not remove structural studs until the required framing has been confirmed by a qualified building professional.
Common causes include an out-of-level track, incorrect hanger adjustment, poorly positioned guides, bowed framing or fasteners protruding into the pocket cavity. Check the alignment and clearances before replacing the rollers or track.
Sometimes. The slab must fit the pocket-door frame and hardware requirements for width, height, thickness and weight. It also needs to provide suitable locations for the hanger hardware, pull and any required latch.
Pocket doors usually have more perimeter gaps than conventional hinged doors, so they are not normally the first choice when maximum acoustic separation is required. A solid-core slab and compatible seals can improve privacy, but the result depends on the complete door, frame and wall assembly.
Final Checks Before You Finish the Pocket Door
A reliable pocket door installation depends on the work completed before the wall is closed. Confirm that the rough opening matches the selected frame system, the track is level, the pocket cavity is clear and the door travels through its full opening without rubbing.
For a straightforward non-load-bearing interior wall, an experienced DIYer may be able to complete the project with the correct kit and tools. Installations involving structural framing, electrical or plumbing changes, oversized doors or more complex layouts are better planned with professional support.
If you are selecting pocket doors or other interior doors for a new home, renovation or larger building project, George can help coordinate door sizes, finishes and project requirements with your drawings or room dimensions.
Planning Pocket Doors for Your Project?
Share your door opening sizes, floor plan or interior drawings, and our team can help review suitable interior door options for your home or building project.


